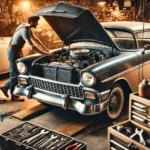
Detailing a classic car is more than just a wash and wax—it’s an art form that preserves the vehicle’s beauty, enhances its value, and shows respect for its history. Whether you’re preparing for a car show or simply maintaining your vintage car’s appearance, this professional step-by-step guide will help you detail your classic with precision and care.
1. Start with the Right Tools and Products
Before you begin, gather the appropriate tools and supplies to avoid damaging delicate finishes and original materials.
🧰 Recommended Supplies:
- pH-balanced car shampoo
- Microfiber wash mitts and towels
- Clay bar and lubricant
- High-quality carnauba wax or ceramic sealant
- Interior cleaners (leather, vinyl, fabric-specific)
- Soft detailing brushes
- Tire and trim dressing
- Chrome and metal polish
- Air compressor or detailing blower (optional)
Pro Tip: Avoid harsh chemicals or abrasive pads that could damage original paint, chrome, or trim.
2. Exterior Wash: Gentle Yet Thorough
Washing a classic car requires care to prevent scratches or water damage.
✅ Steps:
- Rinse the car thoroughly with water to remove loose dirt.
- Use a two-bucket method: one with soap, one with clean water for rinsing the mitt.
- Start from the top and work your way down to avoid spreading grime.
- Rinse again and dry immediately with a microfiber towel or detailing blower.
Pro Tip: Don’t let water sit on the paint—it can leave mineral spots, especially on older finishes.
3. Paint Decontamination and Correction
After washing, remove embedded contaminants and prep the surface for polishing.
🧼 Clay Bar Treatment:
- Spray clay lubricant on the surface and gently glide the clay bar to lift contaminants.
- Work section by section, folding the clay as it gets dirty.
✨ Polishing (if needed):
- Use a dual-action polisher with a mild polish to correct light oxidation and swirl marks.
- Avoid aggressive compounds on original or single-stage paint.
Pro Tip: Always test polish on a small hidden area to check for sensitivity.
4. Protect the Paint with Wax or Sealant
Protecting the paint is key to long-term preservation.
🛡 Choose Your Protection:
- Carnauba Wax: Great for deep shine on older paint. Apply with a foam applicator and buff off with a clean microfiber towel.
- Ceramic Sealant: Offers longer-lasting protection but may not be ideal for all vintage finishes.
Pro Tip: Reapply wax every 2–3 months or after every major outing or show.
5. Clean and Polish Chrome and Metal Trim
Classic cars often feature chrome bumpers, grills, and trim that require special care.
🔧 How to Clean Chrome:
- Use a metal polish with a microfiber applicator.
- Buff gently until you restore the shine.
- Apply a light coat of wax to protect the metal from corrosion.
Pro Tip: For light rust or pitting, use aluminum foil and metal polish to clean without scratching.
6. Restore and Protect the Wheels and Tires
The wheels are focal points of any classic car and should shine like the paintwork.
🧽 Wheels:
- Use a dedicated wheel cleaner that’s safe for your specific wheel type (aluminum, chrome, steel).
- Clean with a soft brush and rinse thoroughly.
🛞 Tires and Trim:
- Apply a non-greasy tire dressing to add a clean finish without attracting dust.
- Use trim restorer on rubber or faded plastic parts to bring back the original color.
Pro Tip: Avoid silicone-based dressings that can damage vintage rubber over time.
7. Detail the Engine Bay (Optional but Impressive)
A clean engine bay isn’t just for looks—it also makes maintenance easier.
⚙ Steps:
- Cover sensitive electrical components and carburetors.
- Gently degrease with a low-pressure spray and appropriate cleaner.
- Use brushes to remove grime and apply dressing to rubber hoses and plastic parts.
Pro Tip: Only clean the engine bay when the engine is cool and avoid excessive water pressure.
8. Restore and Protect the Interior
Original interiors can be delicate, so use mild, material-specific products.
🪑 Upholstery:
- Leather: Use a pH-balanced leather cleaner and conditioner.
- Vinyl: Clean with a vinyl-safe interior cleaner and soft brush.
- Fabric: Lightly vacuum and treat with fabric-safe shampoo or foam cleaner.
🧼 Dashboard & Panels:
- Wipe with a damp microfiber towel and protect with a UV-blocking interior protectant.
🧽 Glass & Gauges:
- Use a lint-free cloth and ammonia-free glass cleaner for crystal-clear results.
Pro Tip: Avoid spraying directly onto any dashboard surfaces—always apply to a cloth first.
9. Final Touches for Showroom Shine
These small details separate amateur detailing from a professional result:
- Clean door jambs and trunk seams with a detailing brush.
- Apply rubber protectant to weather seals.
- Add air freshener for a clean interior scent (go neutral for authenticity).
Pro Tip: Keep a “quick detail” spray on hand for touch-ups at shows or events.
Final Thoughts
Detailing a classic car isn’t just about aesthetics—it’s a celebration of craftsmanship and a way to protect your investment. With the right approach, tools, and attention to detail, you can achieve a professional finish that keeps your classic looking timeless on every drive or at every show.


